LINE is one of the most popular messaging platforms in Japan and across Asia, making it an important communication channel for many photographers and businesses.
By connecting LINE to your KaChick AI Assistant, you can automatically respond to enquiries, receive conversation summaries, and manage messages from your KaChick Dashboard.
In this guide, we'll walk you through the setup process step by step.
Before You Start
To connect LINE to KaChick, you'll need:
A LINE Account
A LINE Official Account
A Messaging API Channel
Channel ID
Channel Secret
Channel Access Token
If you don't have a LINE Official Account yet, don't worry; we'll cover that below.
Step 1: Access the LINE Developers Console
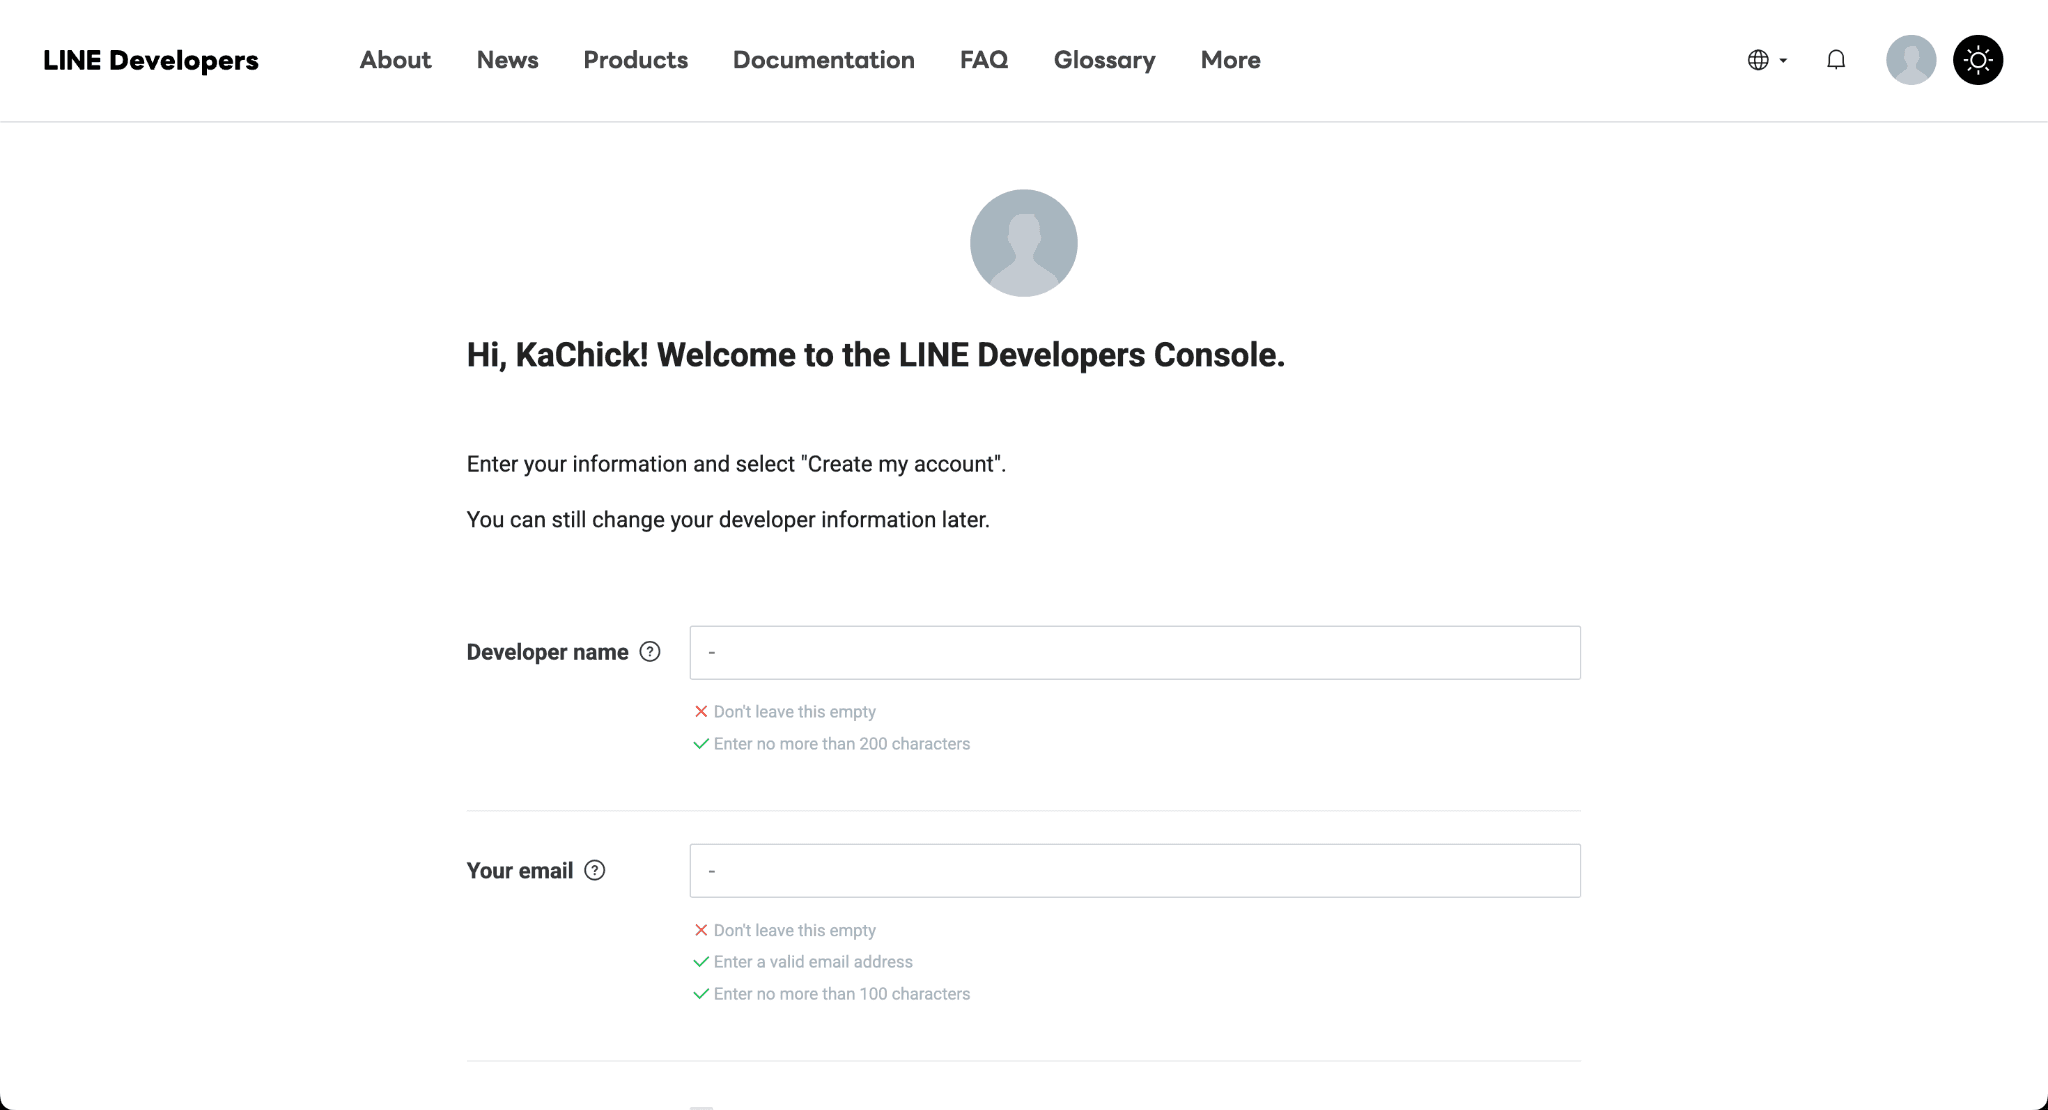
Visit the LINE Developers Console and sign in using your LINE Account or Business Account.
If this is your first time using LINE Developers, you'll be asked to complete your registration by entering your developer name and email address.
Step 2: Create a Provider
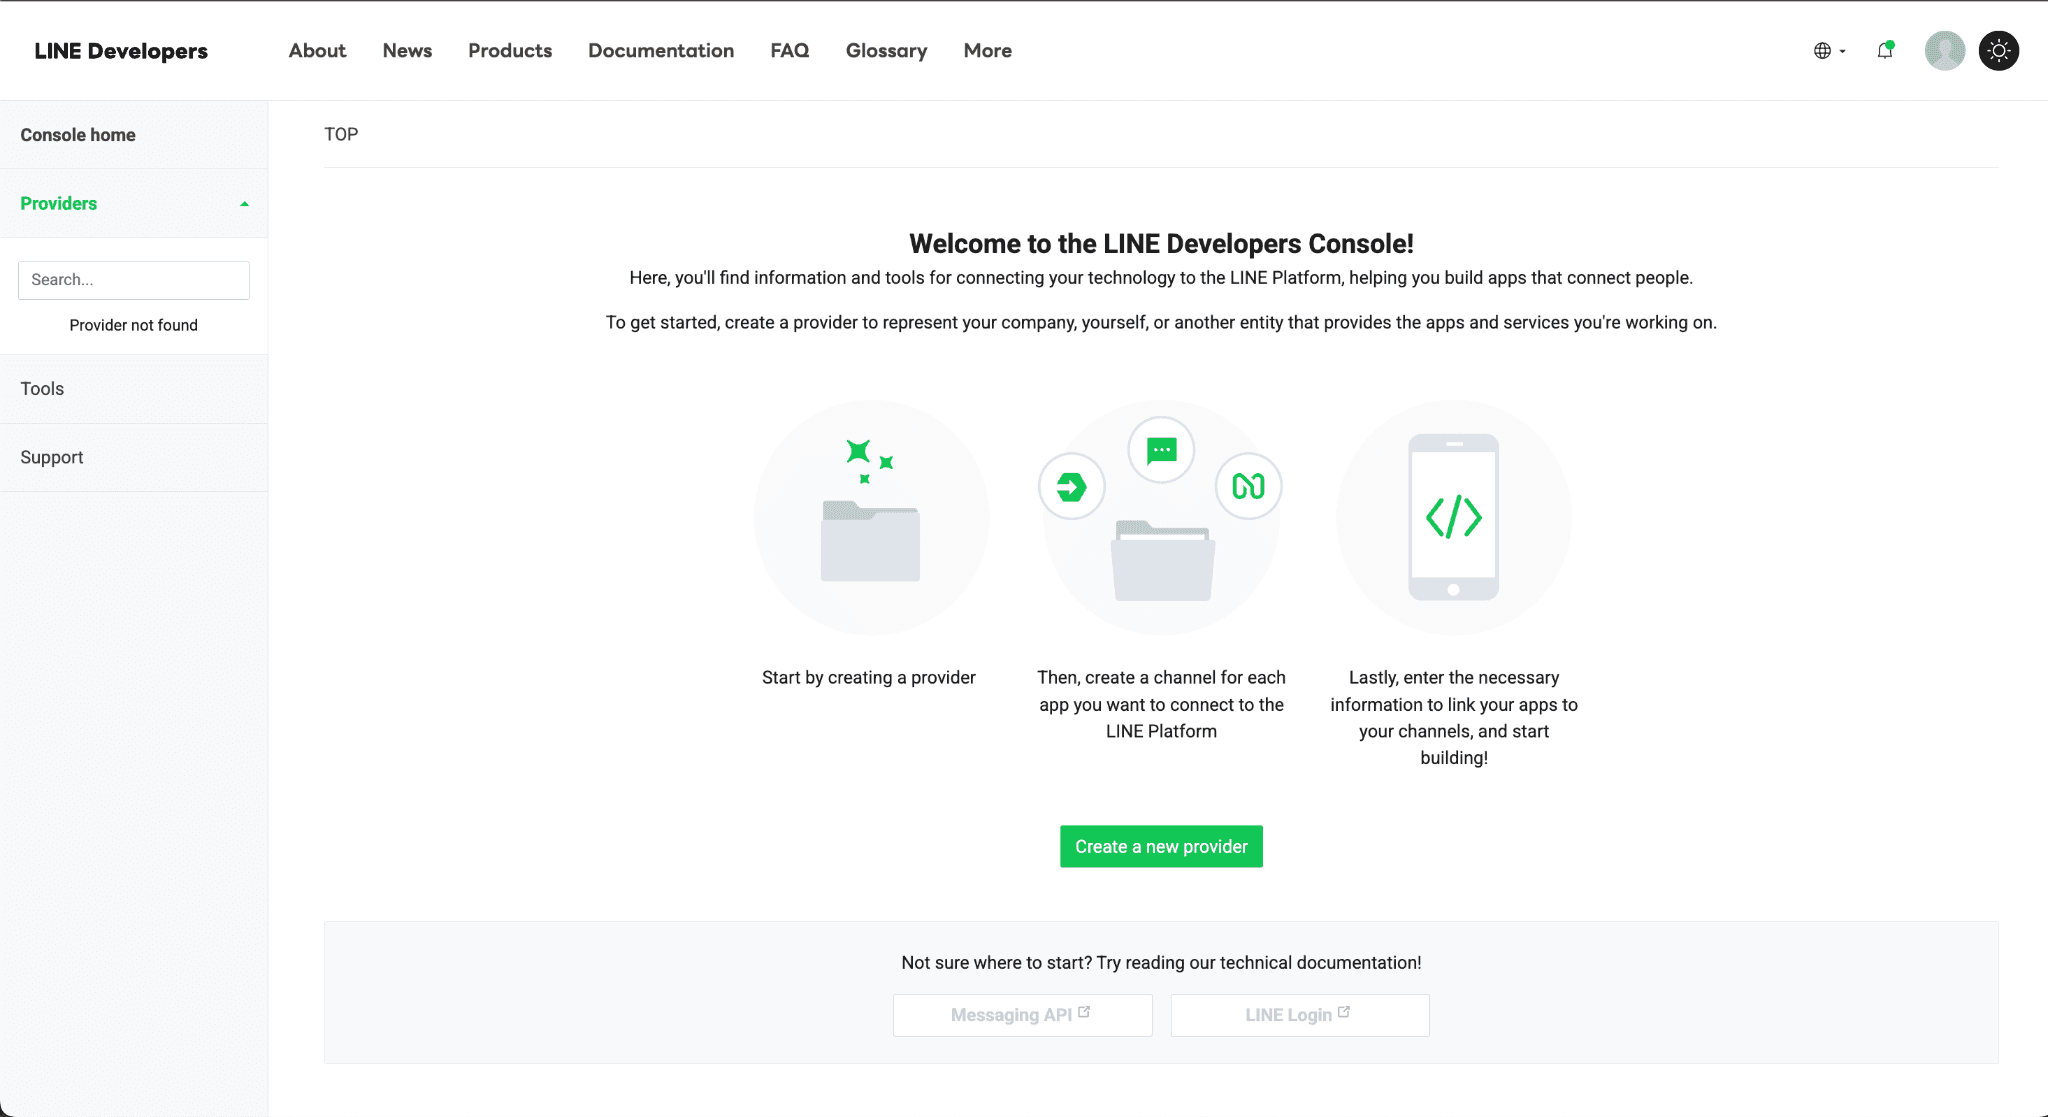
Inside the LINE Developers Console:
Navigate to Providers
Enter your provider name (usually your company or business name)
Click Create
Step 3: Create a Messaging API Channel
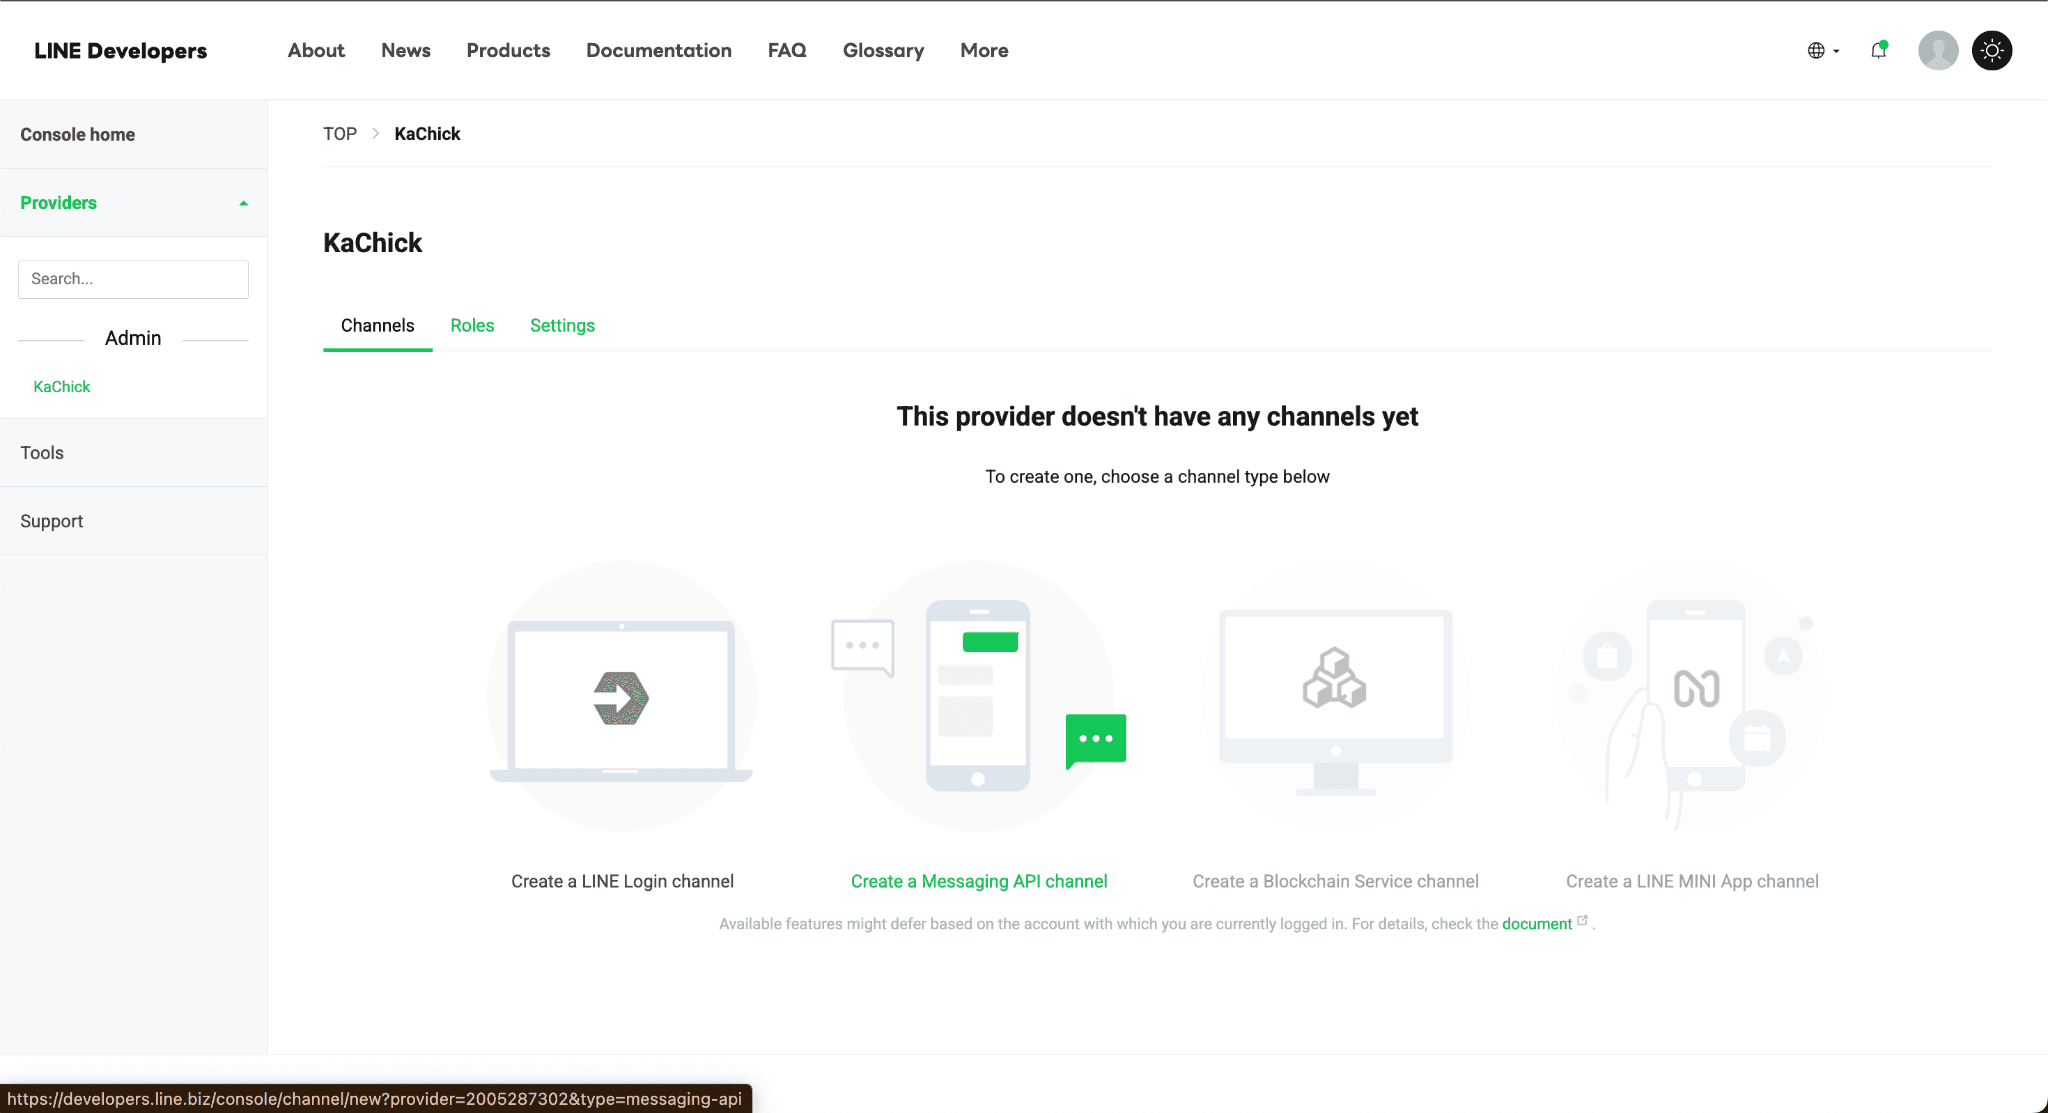
Open your newly created Provider.
Then:
Click Create a Messaging API Channel
Select Create a LINE Official Account
Step 4: Create Your LINE Official Account
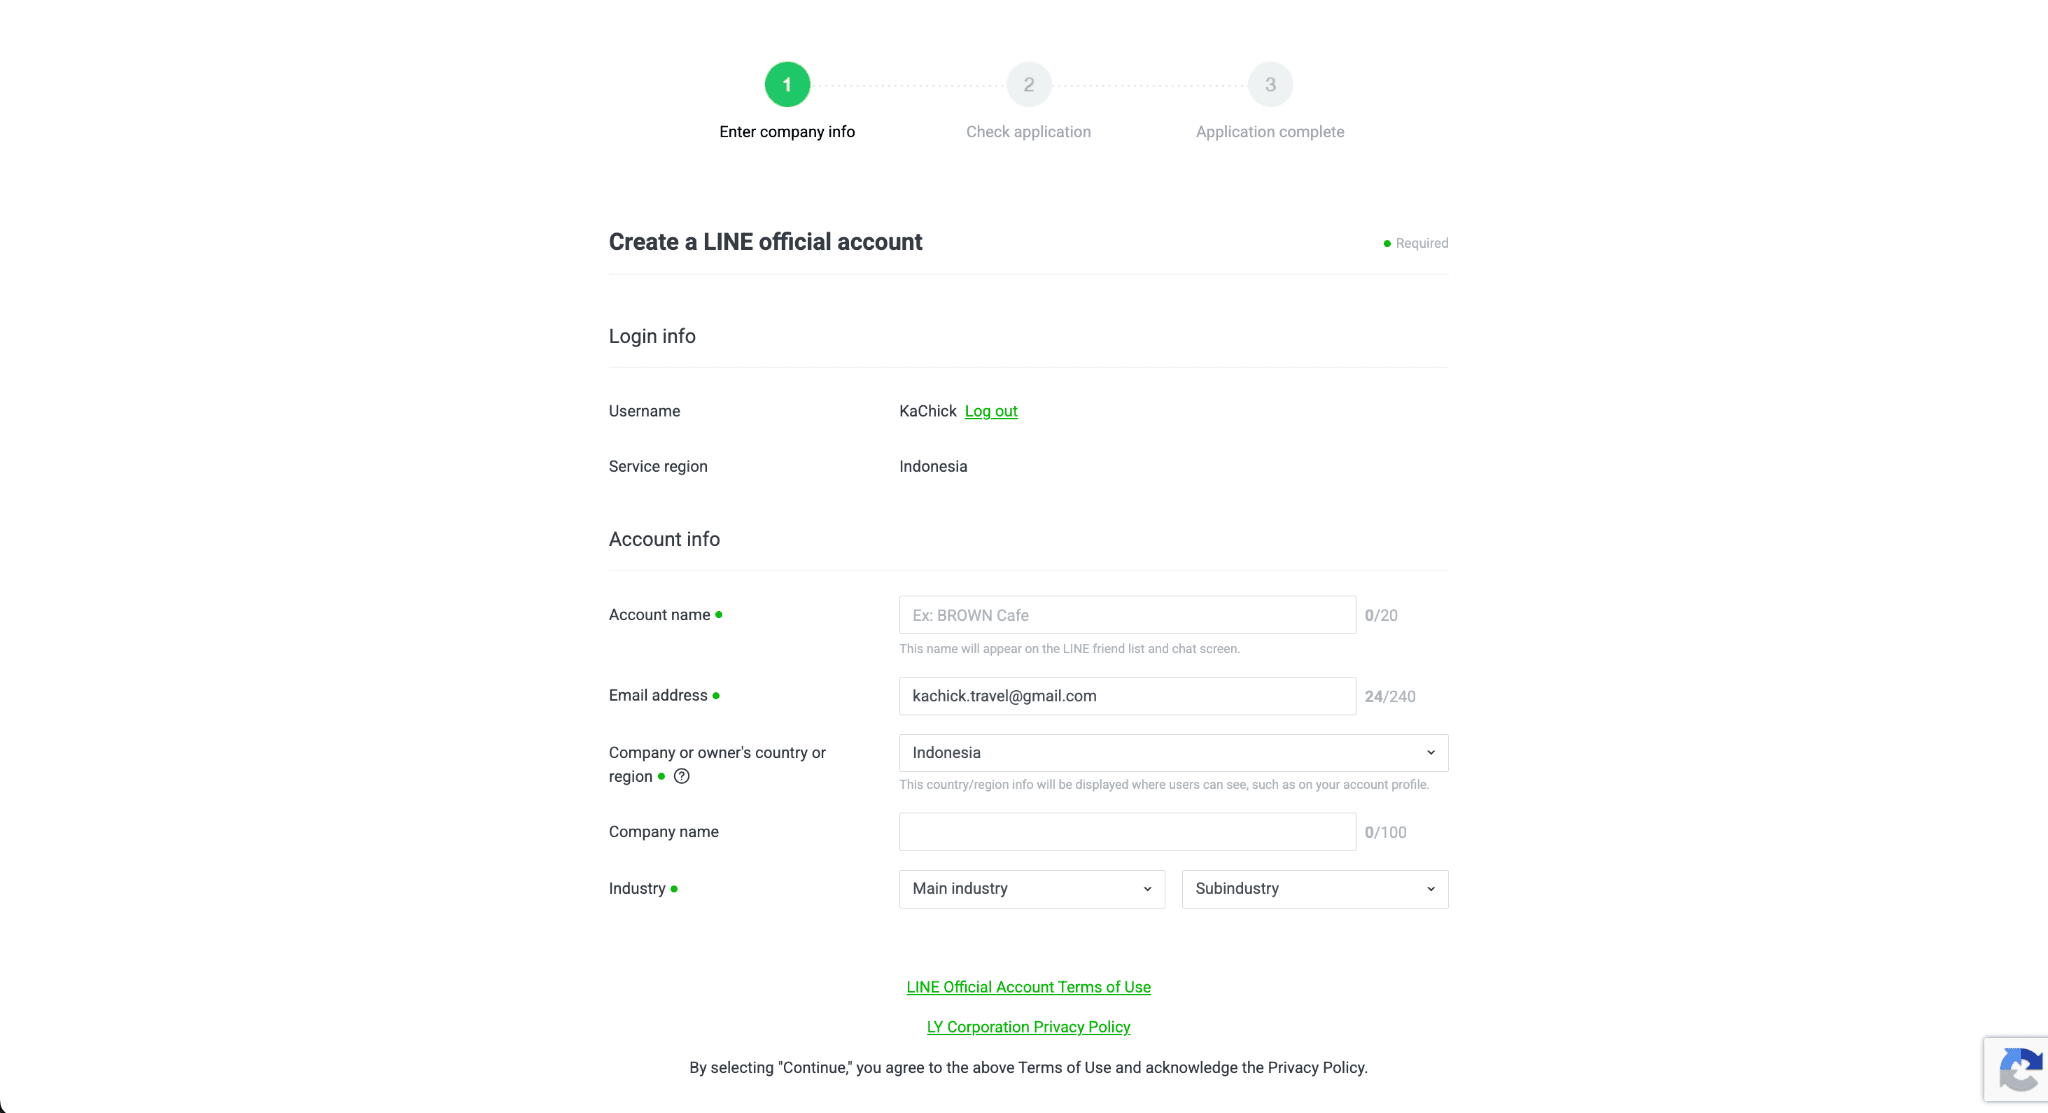
Complete the LINE Official Account setup by:
Verifying your account via SMS
Filling in the required information
Submitting the registration form
Once completed, you'll be redirected to the LINE Official Account Manager.
Step 5: Enable the Messaging API
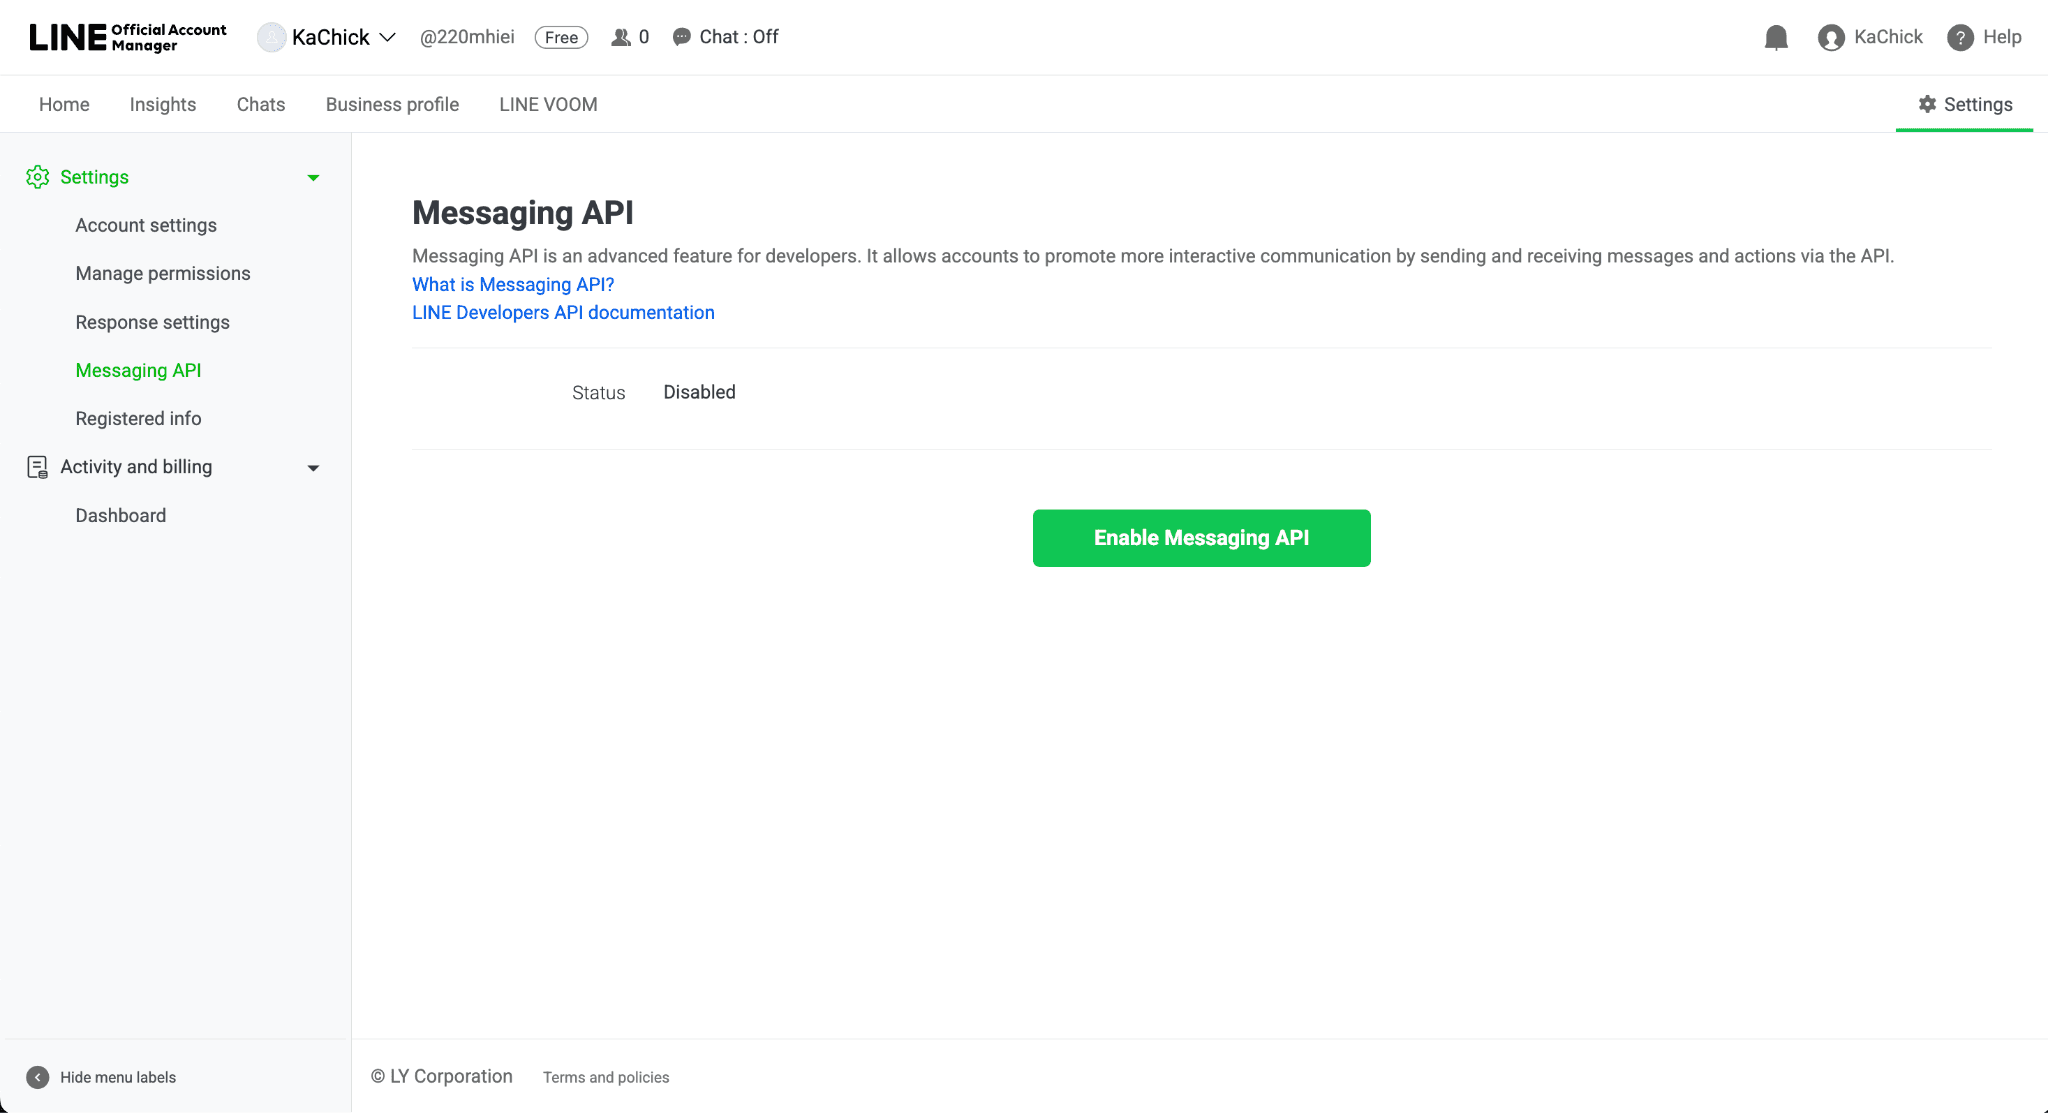
In the LINE Official Account Manager:
Open Settings
Select Messaging API
Click Enable Messaging API
This allows your LINE Official Account to communicate with KaChick AI Assistant.
Step 6: Retrieve Your Channel Credentials
Return to the LINE Developers Console and open your Messaging API Channel.
Copy the following information:
Basic Settings
Channel ID
Channel Secret
Messaging API
Channel Access Token (click Issue to generate one)
Keep these credentials handy—you'll need them in the next step.
Step 7: Connect LINE to KaChick
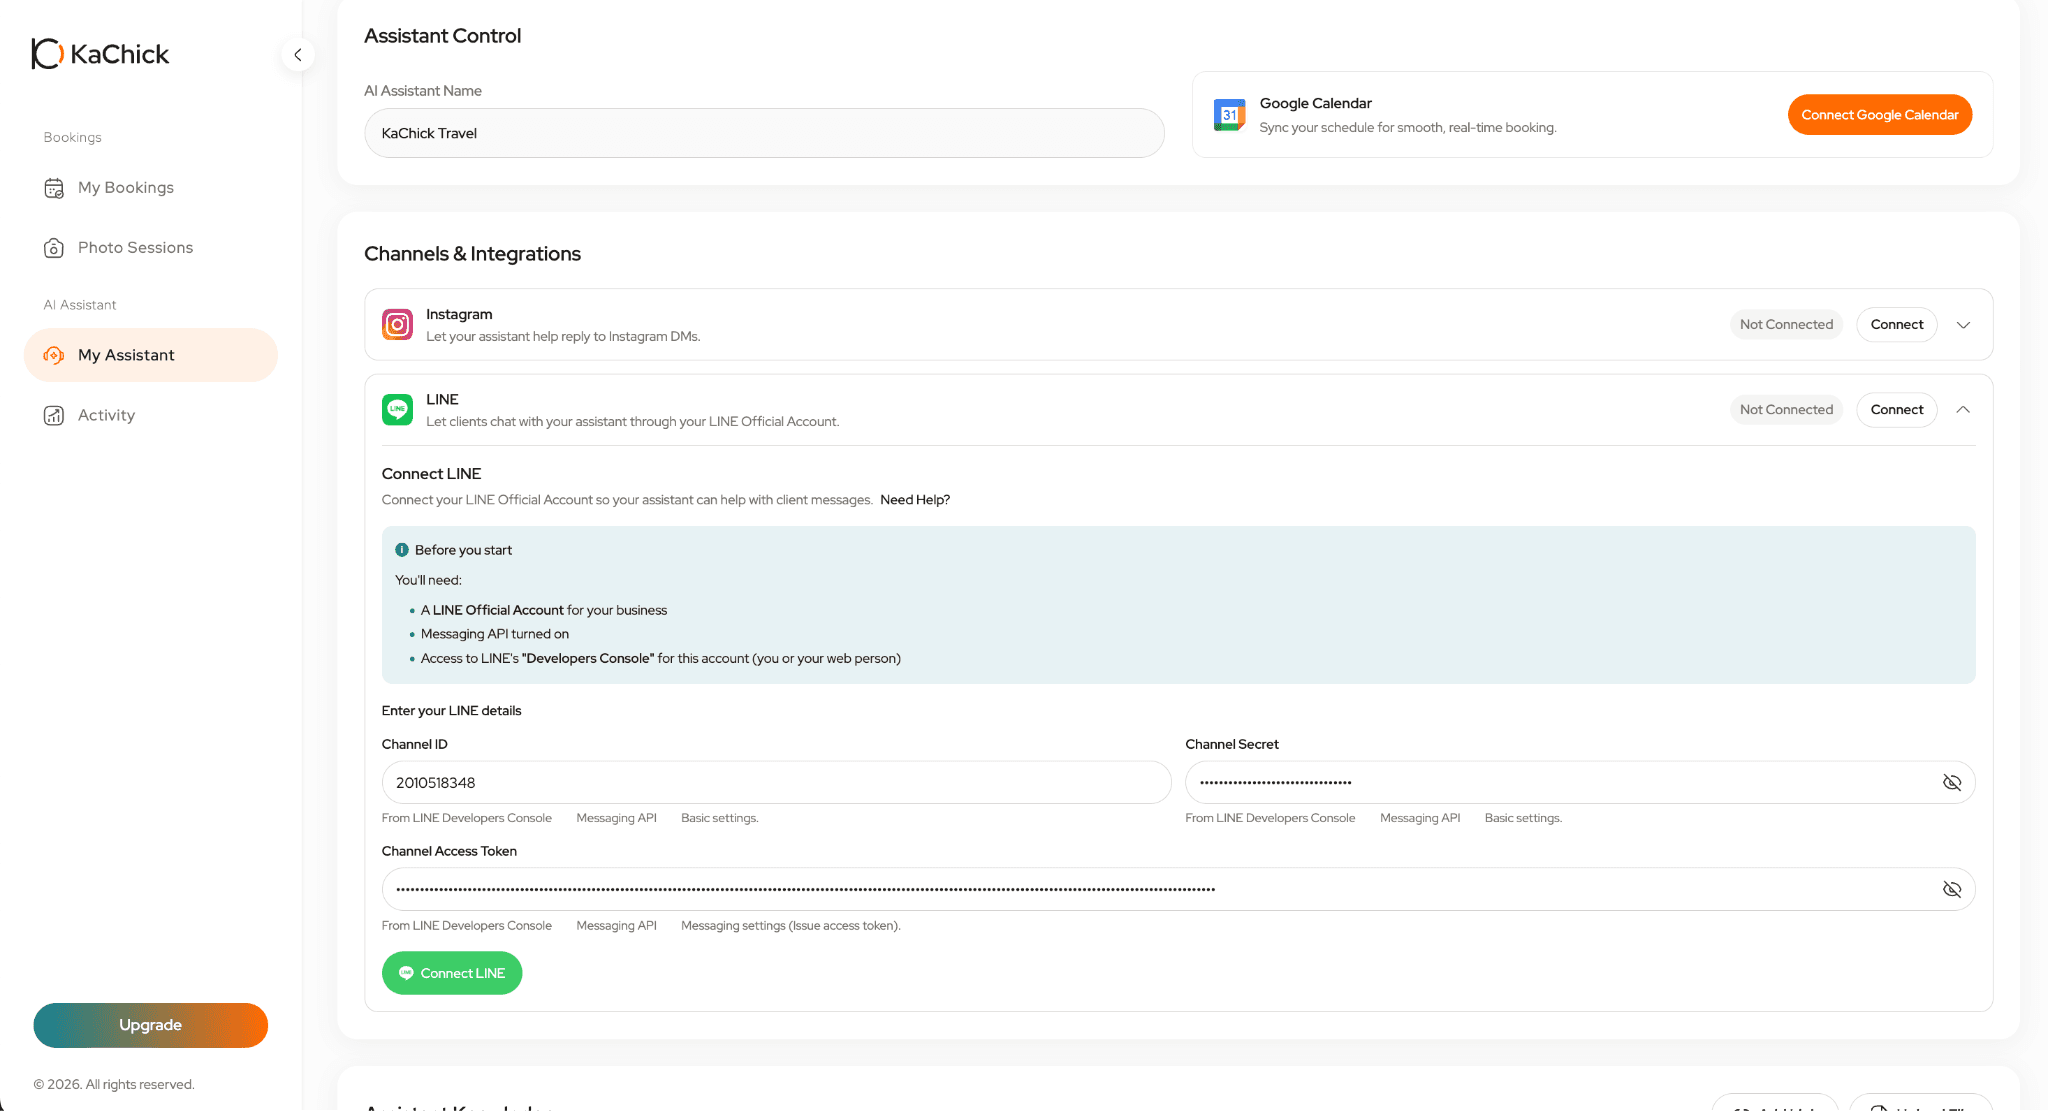
Log in to your KaChick Dashboard and open My Assistant.
Select LINE and enter:
Channel ID
Channel Secret
Channel Access Token
Click Connect to complete the integration.
Step 8: Configure Response Settings
Open the LINE Official Account Manager.
Navigate to:
Settings → Response Settings
Enable:
Chat
Webhooks
Webhooks must be enabled for KaChick AI Assistant to receive and respond to incoming messages.
Step 9: Share Your LINE QR Code
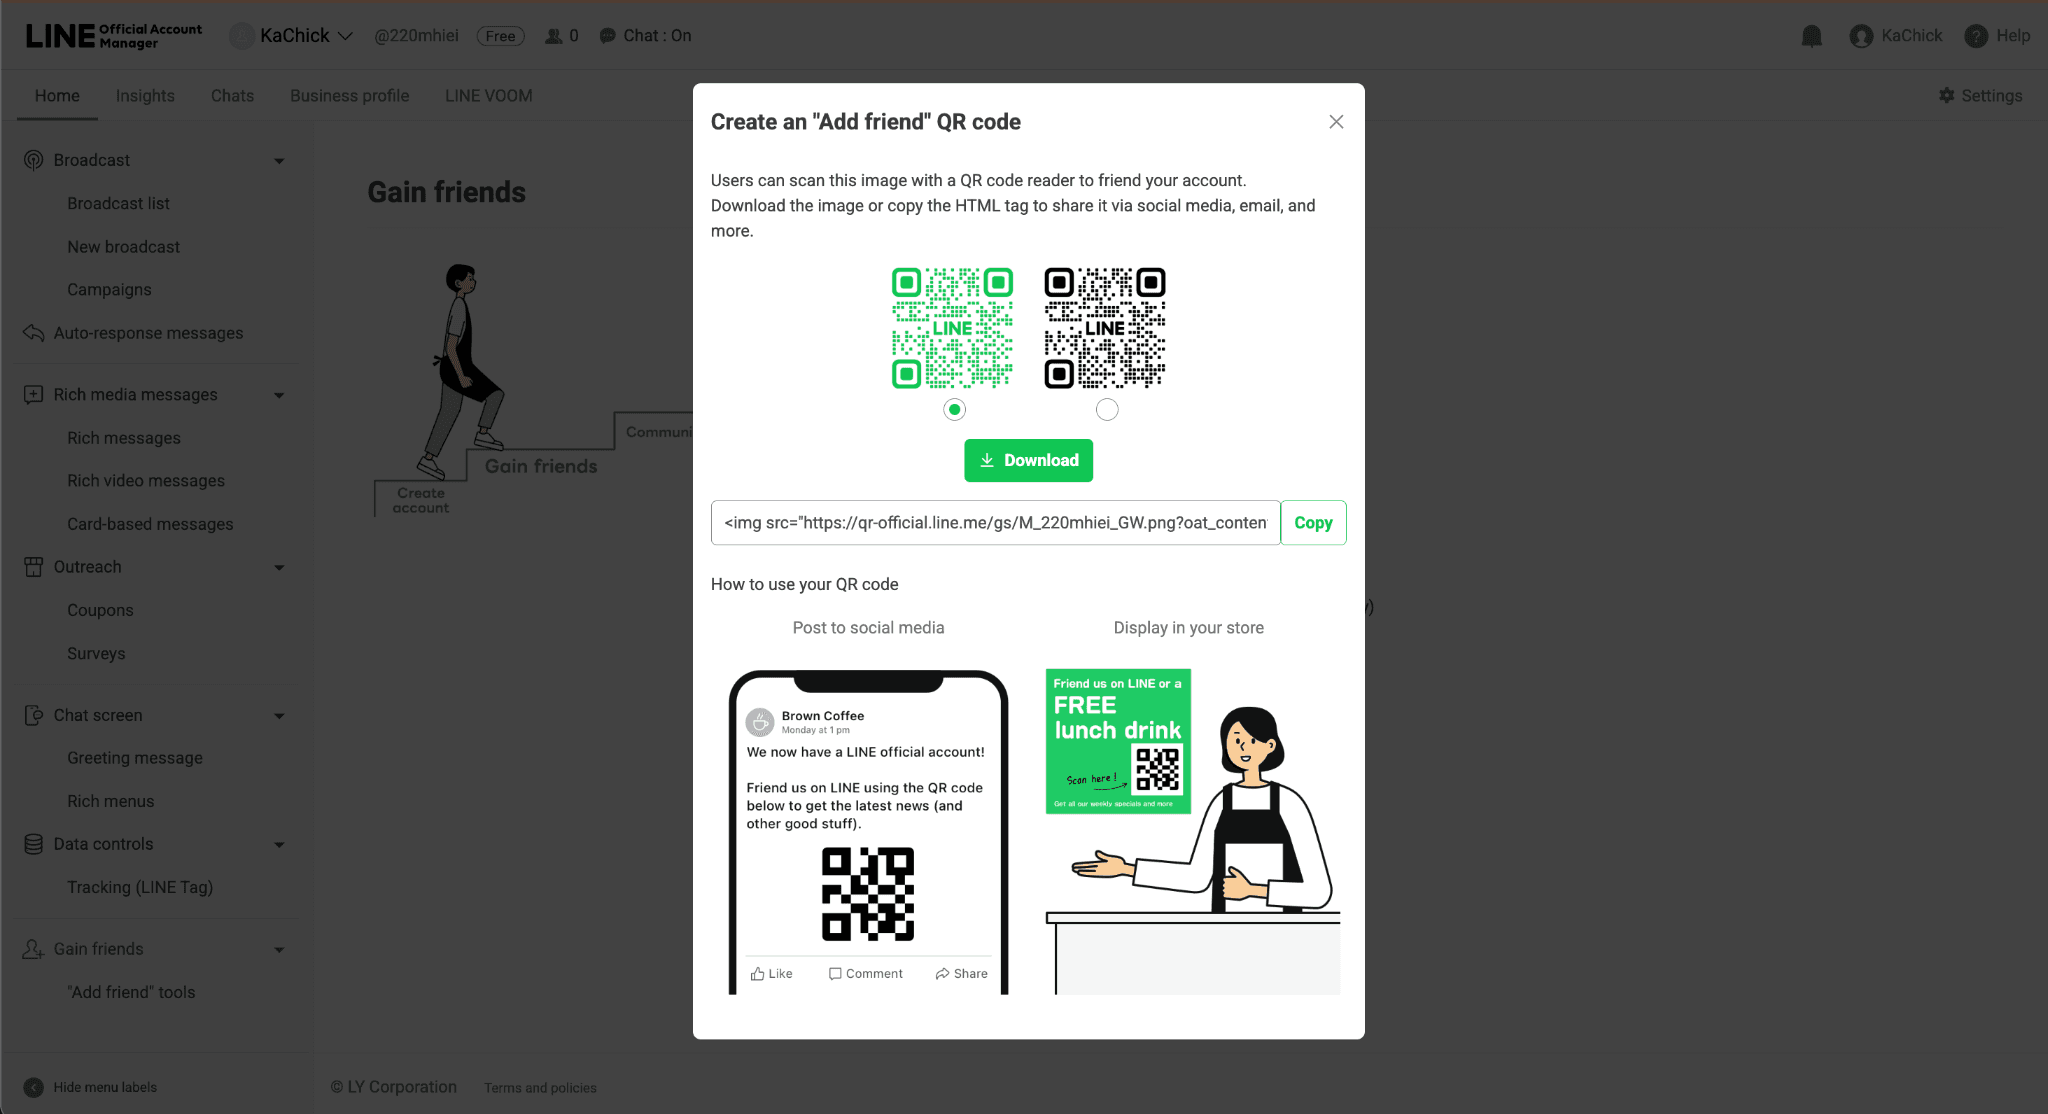
Once your account is connected, you can start sharing your LINE Official Account.
In LINE Official Account Manager:
Home → Promote Your Account → QR Code
Download or share your QR code with clients.
Step 10: Verify Your Integration
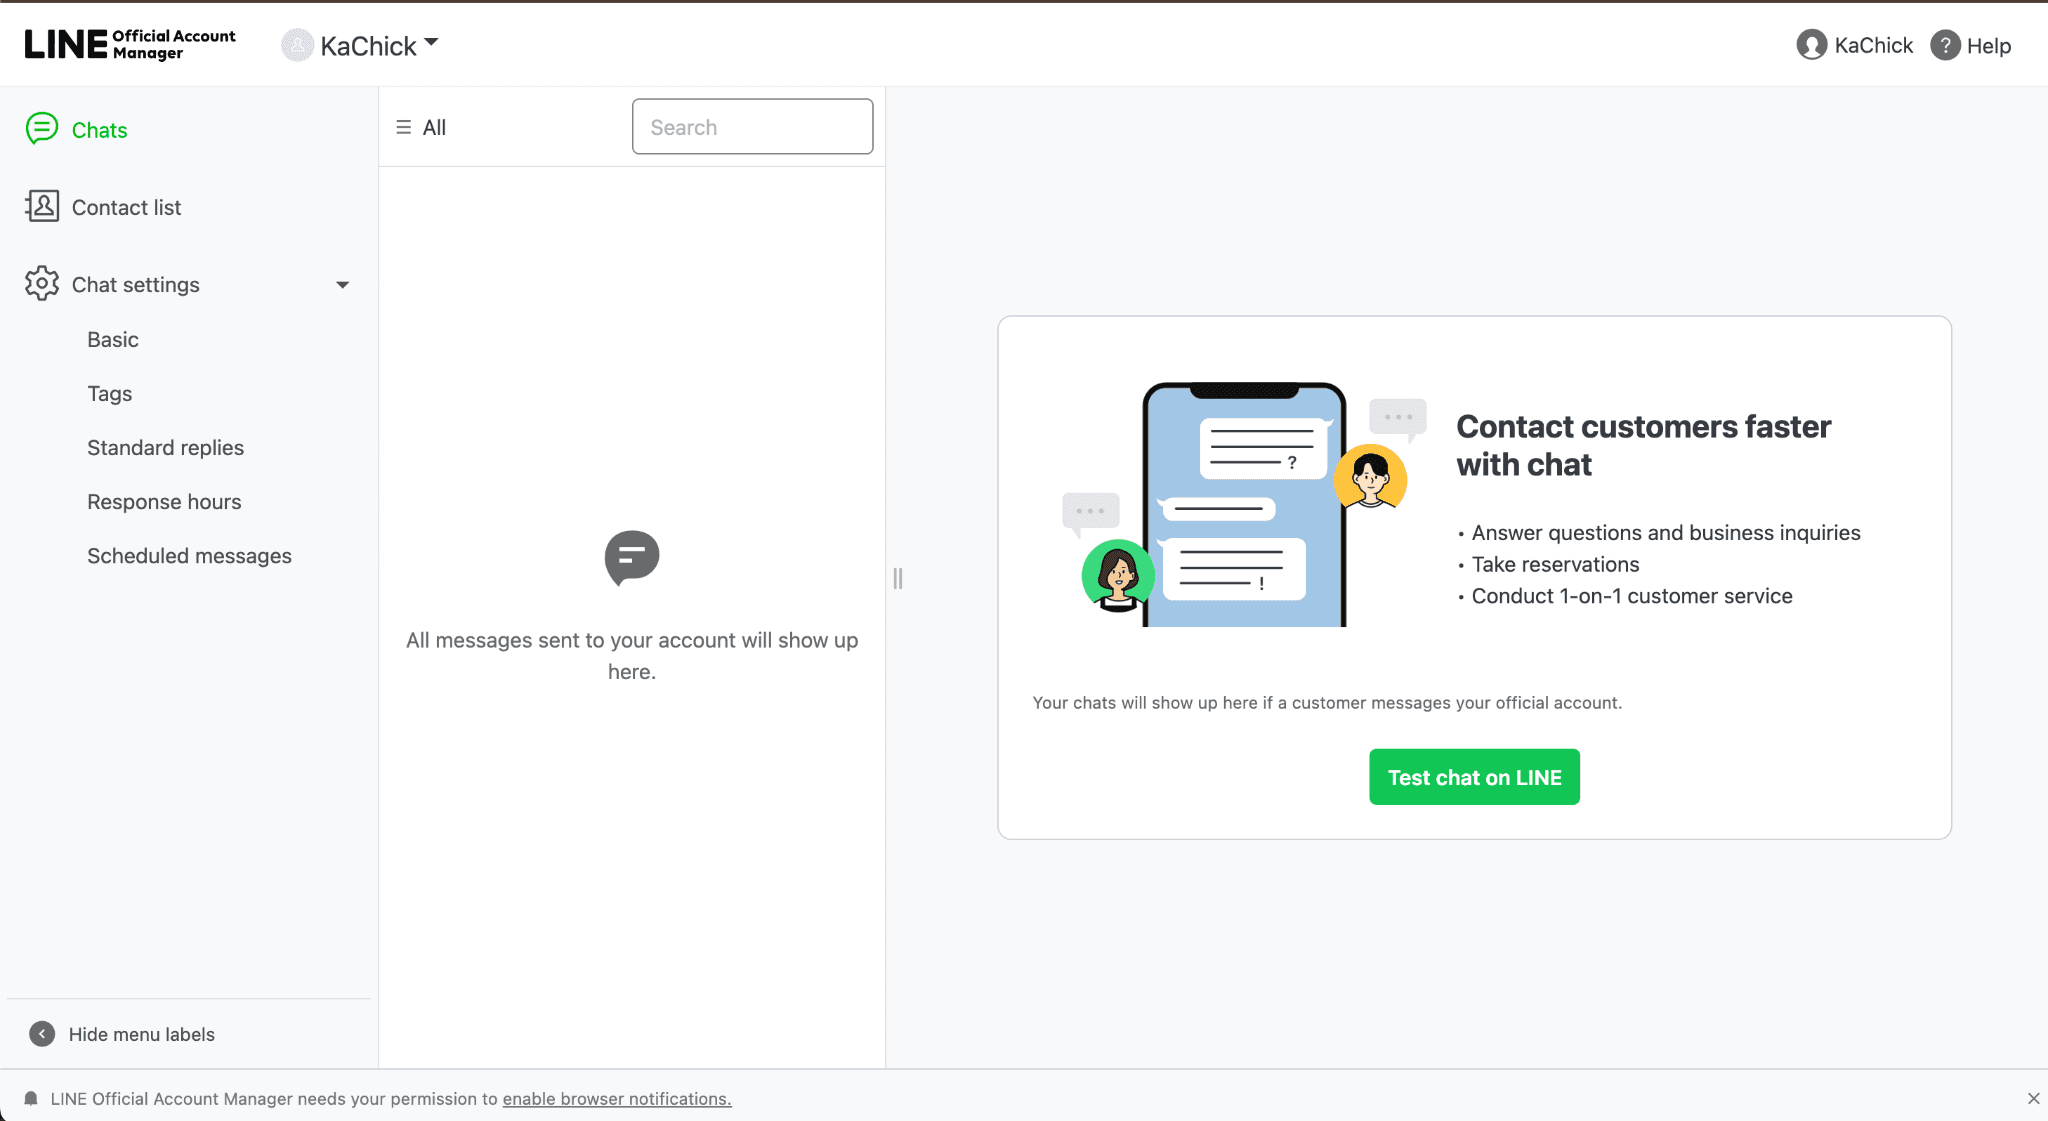
Send a test message to your LINE Official Account.
Make sure:
Your AI Assistant responds
The conversation appears in My Activity
The conversation summary is generated successfully
If you can receive messages through LINE and view the summary in My Activity, your setup is complete.
What Happens After You Connect?
Once LINE is connected, your KaChick AI Assistant can:
Respond to enquiries through LINE
Answer common questions using your assistant knowledge base
Send conversation summaries to your dashboard
Display conversations inside My Activity
Help you stay on top of new enquiries without constantly checking multiple platforms
This allows you to provide faster responses while keeping all your client conversations organized in one place.
Ready to Get Started?
Sign up for KaChick and create an AI Assistant trained on your photography business.
Connect LINE, answer enquiries automatically, keep track of conversations in My Activity, and spend more time focusing on your clients.
Create your AI Assistant today. 🚀